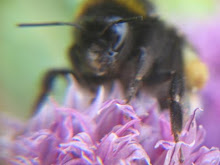

In July while looking for bees around YSP me and Brian, the ecologist, collected some solitary bees so we could ID them later. They are now pinned into a box, but i want to use the bees to make some screen prints for the exhibition and they aren't set in a perfect pose. At first i thought i might have to dissect them, take images of the different parts and put them back together with a bit of photoshop magic, but it was suggested i could relax each of the specimens instead and reset them.
Adam, the entomologist, sent me the instructions for making a relaxing jar so a couple of weeks ago i had my first go - with some dead honey bees as a test run.
To make a relaxing jar you will need:
A wide mouth glass jar with a screw on lid
Some absorbent material (news paper, sand or cotton)
Some blotting paper
Ethyl acetate (found in some nail polish removers)
Method:
Place the absorbent material in the bottom of the jar and moisten with water and add a drop or two if ethyl acetate. Cut out a disc of blotting paper to fit tightly inside the jar and sits on top of the absorbent material. Place the insect on the blotting paper and close the jar tightly. Let it sit for about 2-3 days, at high humidity. After that period, if the insects are flexible, mount them immediately. If the specimens are still too stiff, keep them in the relaxing jar longer, checking them everyday for signs of mold.
I went and bought some nail varnish remover and made my relaxing jar and put a couple of bees in. Then put the jar in the airing cupboard. I checked on them a few times eager to see if my bees were all floppy and pliable, but after about 3 days i forgot to check...
So, here are my first relaxed bees - a bit of a moldy disaster, having spent over a week in our airing cupboard. I'm glad i didn't try it with my solitary bees. I'll keep trying on other bees in the next few days to get better at it before attempting it with the solitary bees.

No comments:
Post a Comment